Discover “How to Paint on Denim”. The essentials of fabric and acrylic paints and top tips for successfully painting on jeans.
Upcycling old jeans is fun, but sometimes the sea of blue denim is a bit much, and you yearn for colour. An easy solution is to paint your denim creation, whether a jacket or bag, into a fantastic unique creation.
As an example of denim painting, the post includes a fun step-by-step tutorial for painting on jeans pockets and making handy, pretty hanging denim pocket storage.
The Basics of Painting on Denim
Why You Might Want To Paint Denim
Painting on denim is a popular activity for several reasons:
- Individuality: It allows you to personalize and bring uniqueness to your clothing.
- Eco-friendly: It’s a sustainable way to repurpose old or stained denim items.
- Affordability: It’s a cost-effective means to own custom fashion pieces.
- Creativity: It offers a unique canvas for artistic expression.
- Therapeutic: It can serve as a relaxing, stress-relieving hobby.
- Thoughtful Gifts: Custom-painted denim can make personalized and meaningful presents.
Understanding Your Canvas
Denim is a robust and textured fabric made primarily from cotton. It can absorb paint well, but its rough surface may make it slightly more challenging to paint than a smoother canvas. However, its durability allows for the creation of detailed and lasting designs.
The colour of your denim will also play a part in how your paint colours appear, with lighter denim typically allowing for a more vibrant outcome.
Choosing Your Paint
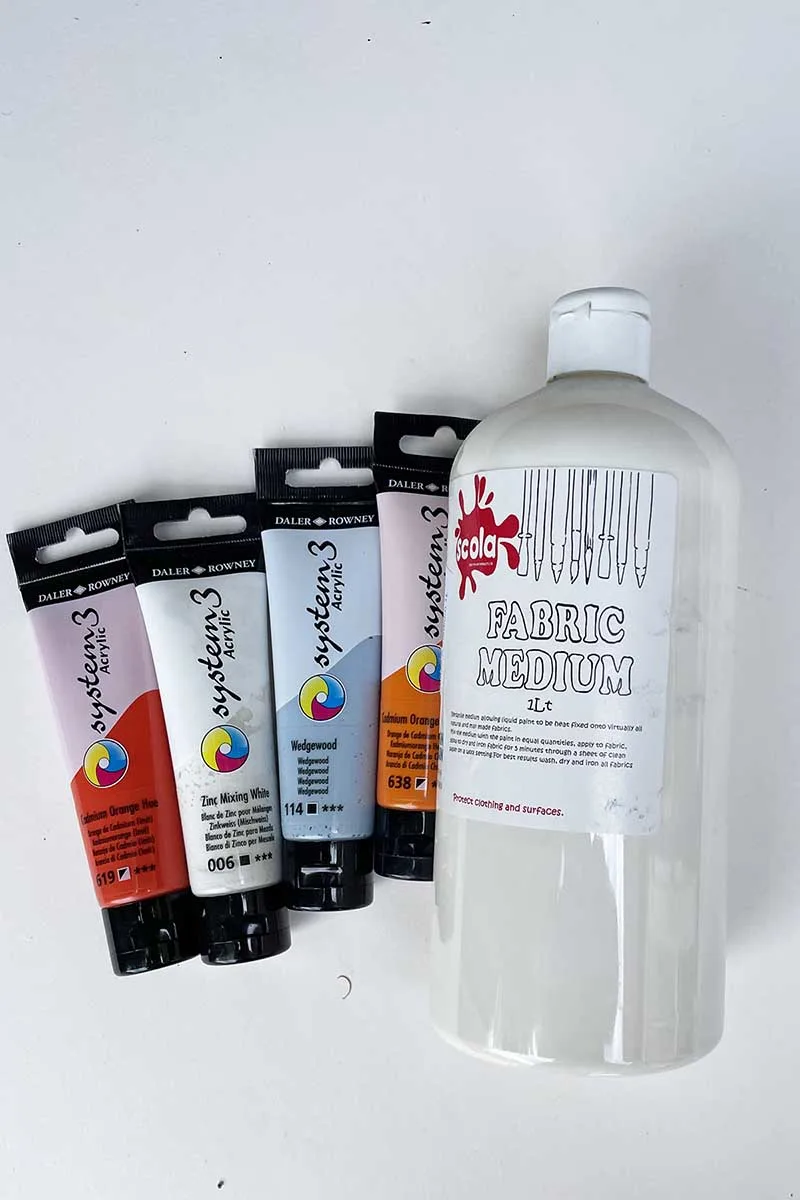
While you can technically use any paint on denim, fabric paints and acrylic paints mixed with a fabric medium are most recommended.
- Fabric paints are specially designed for use in textiles. They’re flexible, permanent, and formulated to stick to fabrics even after washing. They typically don’t require any heat setting and come in various styles like opaque, transparent, metallic, and even 3D puff paints.
- Acrylic paints, typically used on canvas, can also work on denim. However, they must be mixed with a fabric medium to ensure flexibility and longevity. The paint might crack or peel off without the fabric medium after washing.
Painting Process – The Top Ten Tips
- Prep your jeans: Clean and iron your jeans. Washing removes any surface dirt or chemicals, and ironing provides a smooth canvas for painting.
- Place a piece of cardboard under the denim to create a hard surface and stop the paint from seeping.
- Sketch or stencil your design: To avoid mistakes, consider using a stencil or sketching your design on the denim with a fabric pencil before painting.
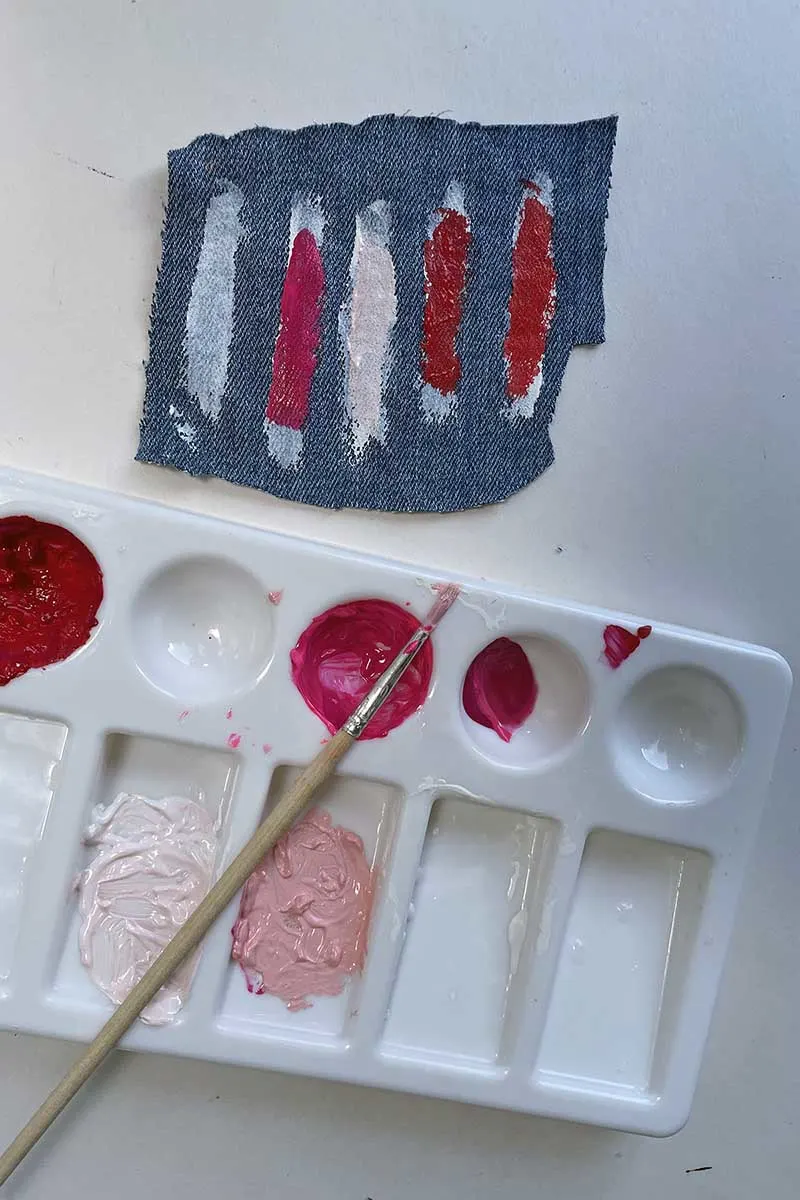
- Test Your Paint: Before applying your paint to your main piece, test the colours and consistency on a similar fabric or an inconspicuous part of your denim.
- Start painting: Begin with lighter colours, applying your paint in thin, even layers. Use a smaller brush for detailing. I recommend painting a white undercoat before painting on top, ensuring your colours pop on the darker denim canvas.
- Layer your colours: Once your base colours have dried, apply your paint in thin layers to prevent cracking or peeling. Let each layer dry before applying the next one.
- Work from Light to Dark: Start with lighter colours and gradually add darker ones. This approach gives your design depth and dimension.
- Enhance your Denim Art with a permanent marker– If you’re looking for a way to make your images look neater and more professional, edging them with a permanent marker can be a game-changer. This approach can create defined lines, add contrast, and give your design a polished, finished look.
- Seal your design: Let your design completely dry. Then, use an iron (on a medium setting) to heat-set your design, sealing the paint into the fabric. Cover your design with a thin cloth to prevent direct contact between the paint and the iron.
- Care for Your Artwork: Wash your painted denim gently by hand in cold water and air-dry it. This approach will help maintain the integrity of the design.
FAQs About Painting on Denim
Absolutely! Washing and ironing your denim before painting removes any surface dirt or chemicals and provides a smoother canvas for painting.
Painting on stretchy denim can be tricky. The stretching can cause cracks in the paint over time. If you decide to paint on stretchy denim, make sure to mix your paint with a fabric medium to improve flexibility.
Yes, but with care! Hand wash your painted denim in cold water with mild detergent. To dry, turn it inside out and hang it up. Avoid using the dryer, as the heat could cause the paint to crack or peel.
It usually takes at least 24 hours for the paint to fully dry. After that, it’s recommended to heat-set your design with an iron to seal the paint into the fabric.
While not always necessary, especially when using fabric paint, a sealant can provide extra protection for your painted design. Consider using a clear acrylic spray sealant. Always test the sealant on a small, hidden area first to ensure it doesn’t discolour your design.
DIY Mushroom Painted Denim Pocket Hangers For The Kitchen
Are you looking for a creative, cost-effective, and eco-friendly way to add more storage to your kitchen? Why not turn the pockets of your old jeans into decorative and handy denim pocket hangers?
I recently transformed my old jeans pockets into functional & whimsical kitchen storage.
Why Mushrooms?
Mushroom crafts are a popular theme in home decor, and I have a few homemade mushroom decorations throughout my home. I wanted to continue the theme into the kitchen with these upcycled denim pocket hangers.
Mushrooms have an aesthetic appeal; they can range from simple, rounded forms to intricate, delicate shapes, providing a versatile subject for painting.
They can be painted in a wide variety of colours. This allows for a lot of creativity in how you want your design to look and can make your artwork stand out. Mushrooms are a simple beginner subject for painting on denim, allowing focus on honing techniques and playing with colour.
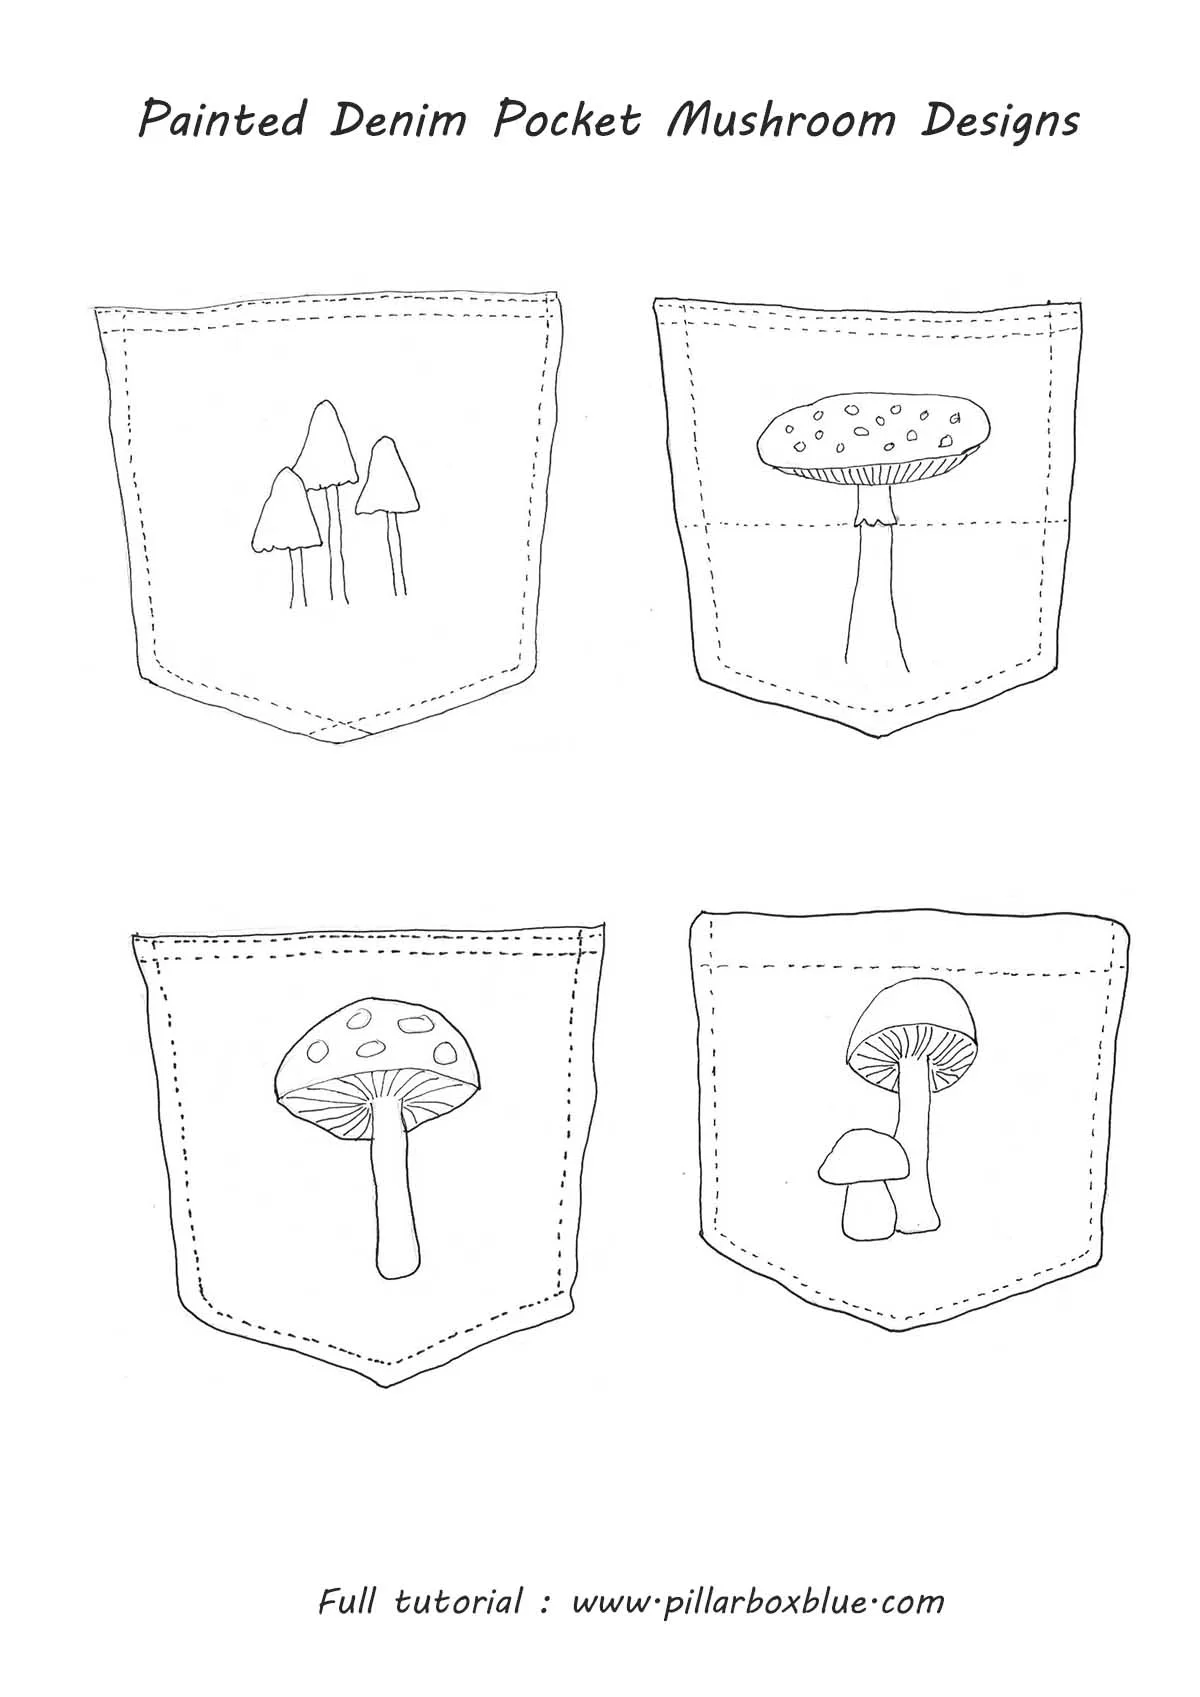
Check out any mushroom poster or chart for inspiration. Or you can use the mushrooms below I used for my denim painting.
Materials Used
We’re a participant in the Amazon Services LLC Associates Program, an affiliate advertising program designed to provide a means for us to earn fees by linking to Amazon.com and affiliated sites. As an Amazon Associate, I earn from qualifying purchases.
- Three denim back pockets cut from old jeans and the three denim hems.
- Acrylic paints in various colours
- Fabric medium
- Embroidery marker pen
- Fine black sharpie
- Needle and thread
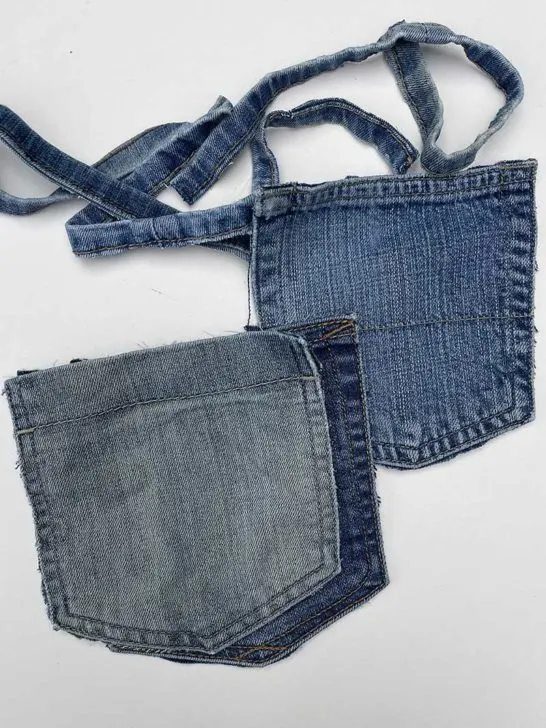
Making The Mushroom Pockets
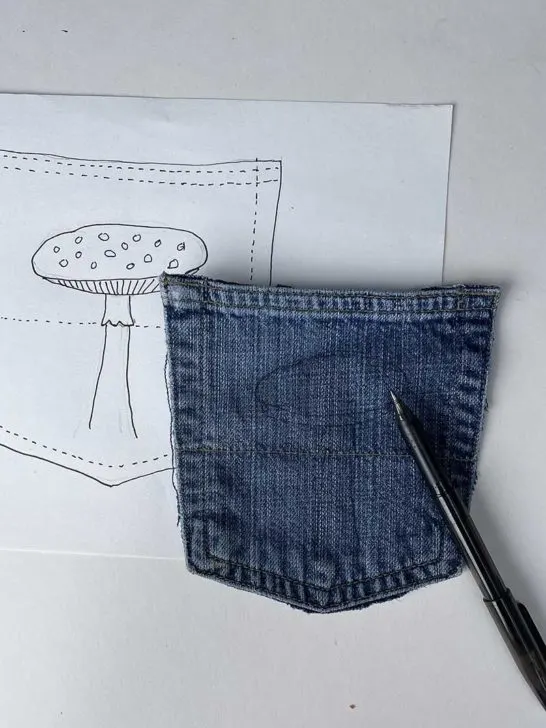
Step 1: Sketch your mushroom onto the denim pockets using an erasable embroidery pen. You might want to make a paper template first to ensure your design will fit.
To help there is a fabulous tutorial here on how to draw mushrooms easily. It’s suitable for beginners and might give you more ideas for different designs.
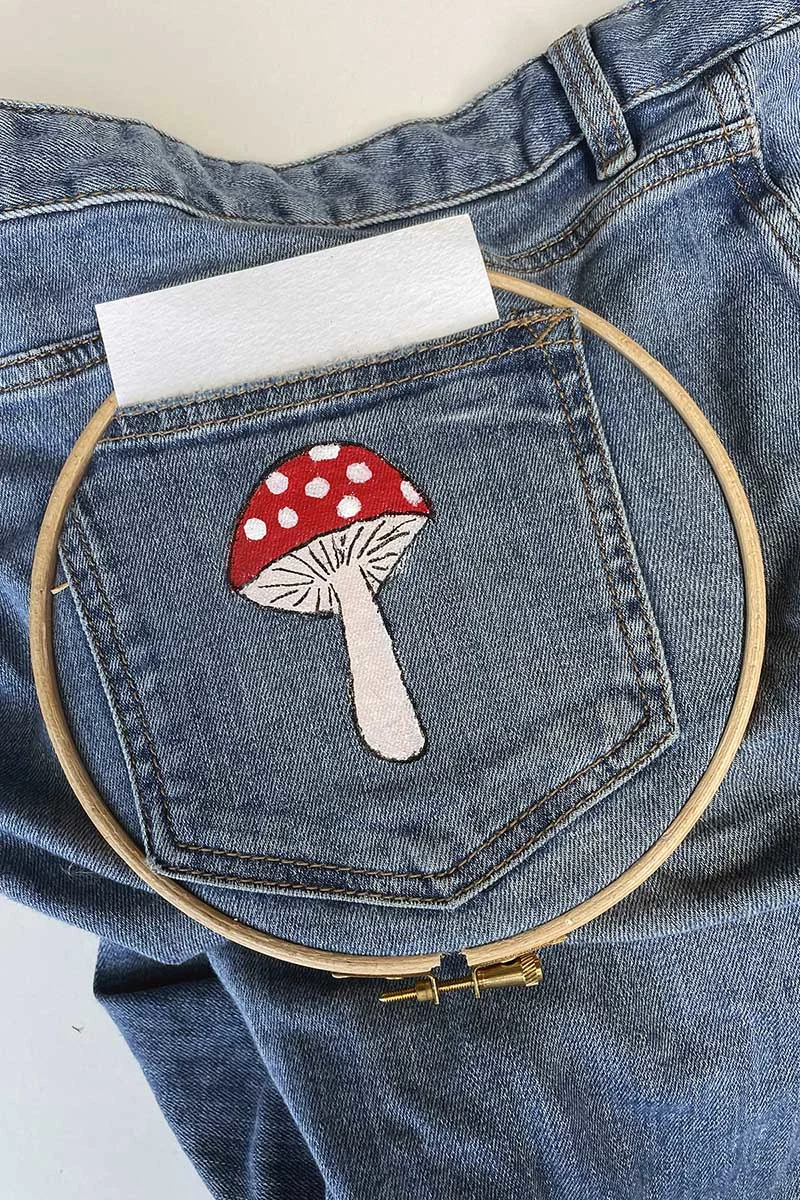
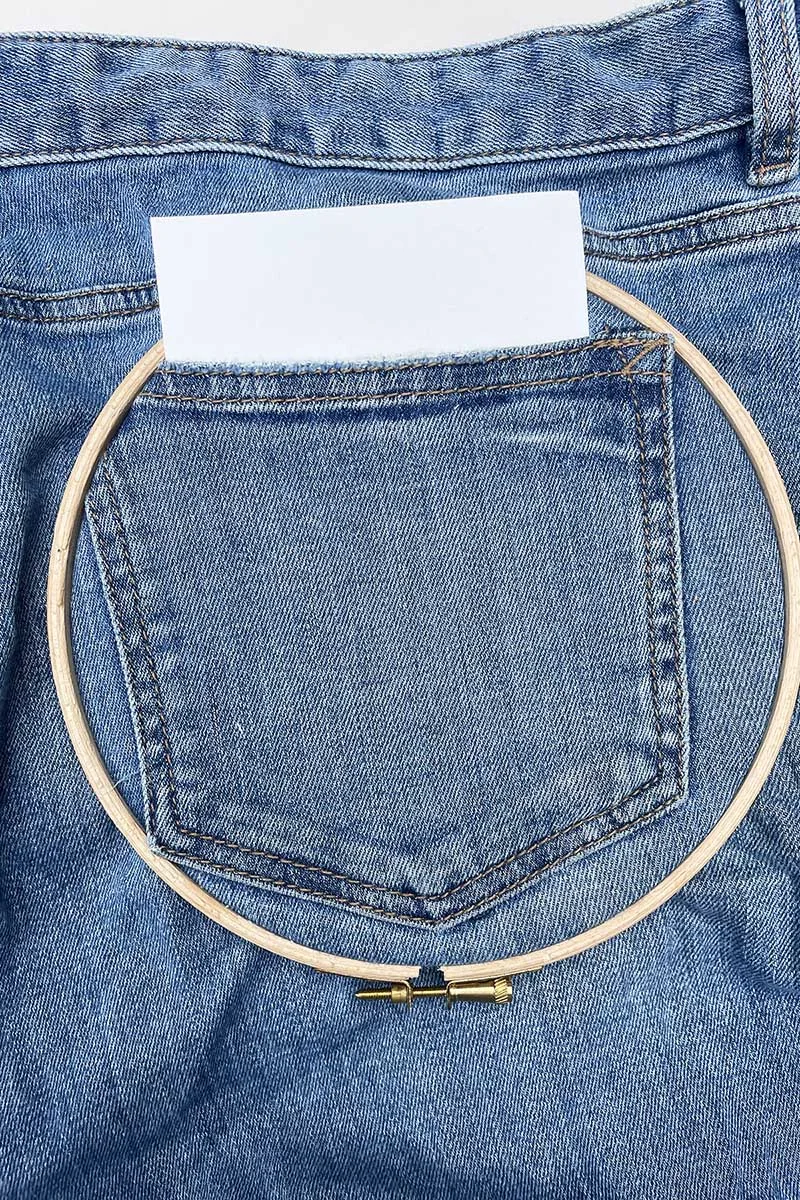
Step 2: Mix your acrylic paints with the fabric medium according to the bottle’s instructions (if using fabric paint, you can miss this part). Place the denim pocket on a flat surface; if still attached to the jeans, use an embroidery hoop to pull the denim tight.
Put a piece of cardstock into the denim pocket to create a firm painting surface.
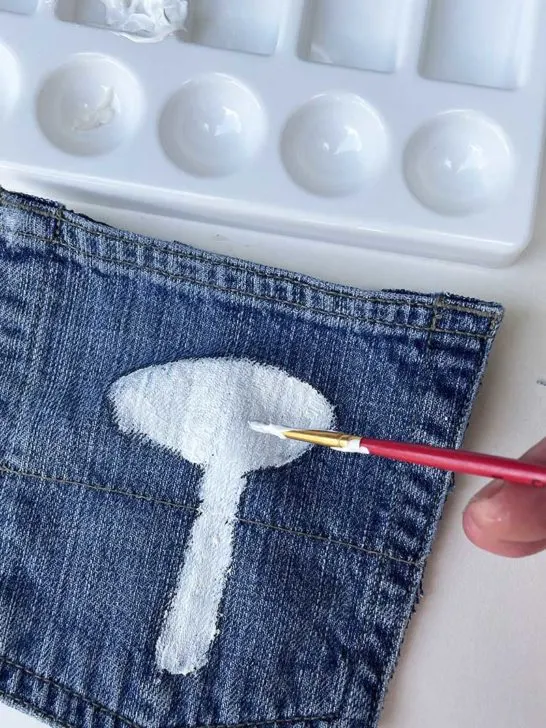
Step 3: Paint a white background to help your colours pop. This is essential for darker shades of denim.
Step 4: Add the colours once the white background paint has dried. Paint in thin layers, letting the colours dry in between. This will help the denim absorb the paint and prevent cracking. Test the colours on a swatch as you go along.
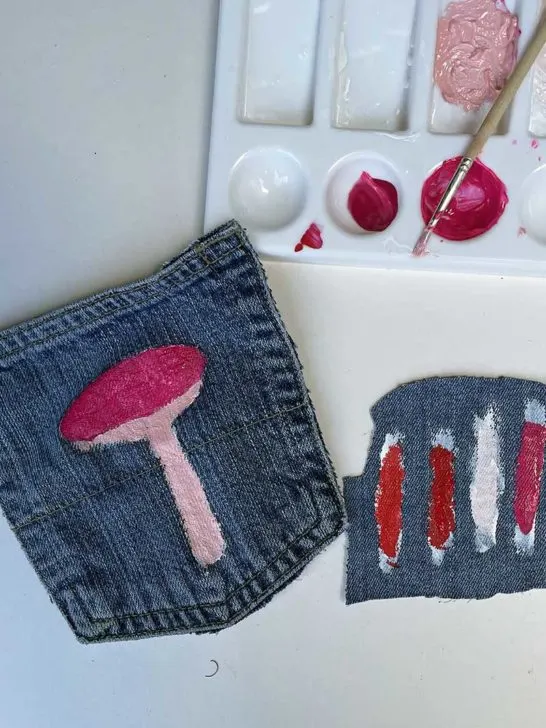
Step 5: After completely drying your paint, you can add details and edit your design with your marker. If you’re edging a design, use a steady hand to outline the image, enhancing its shape and providing a clean, crisp border.
Step 6: Finish off by sealing your design. Let your design completely dry. Then, use an iron (on a medium setting) to heat-set your design, sealing the paint into the fabric. Cover your design with a thin cloth to prevent direct contact between the paint and the iron.
Step 7: Sew in the denim hems at the top of each painted denim pocket to make a hanging loop.
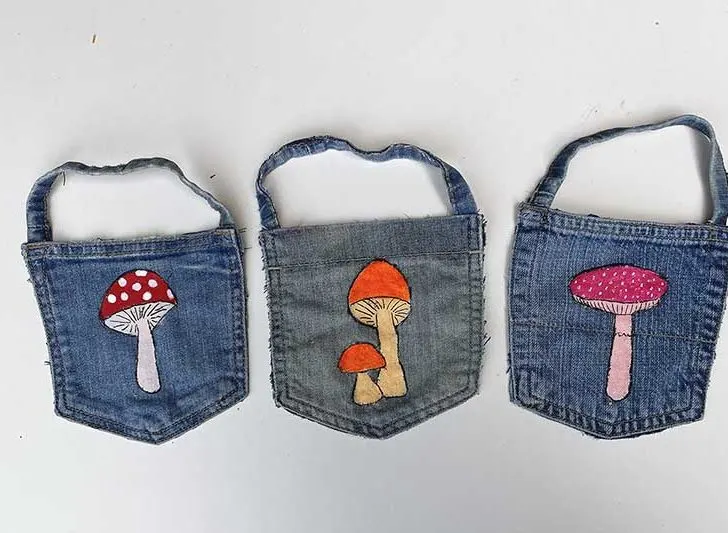
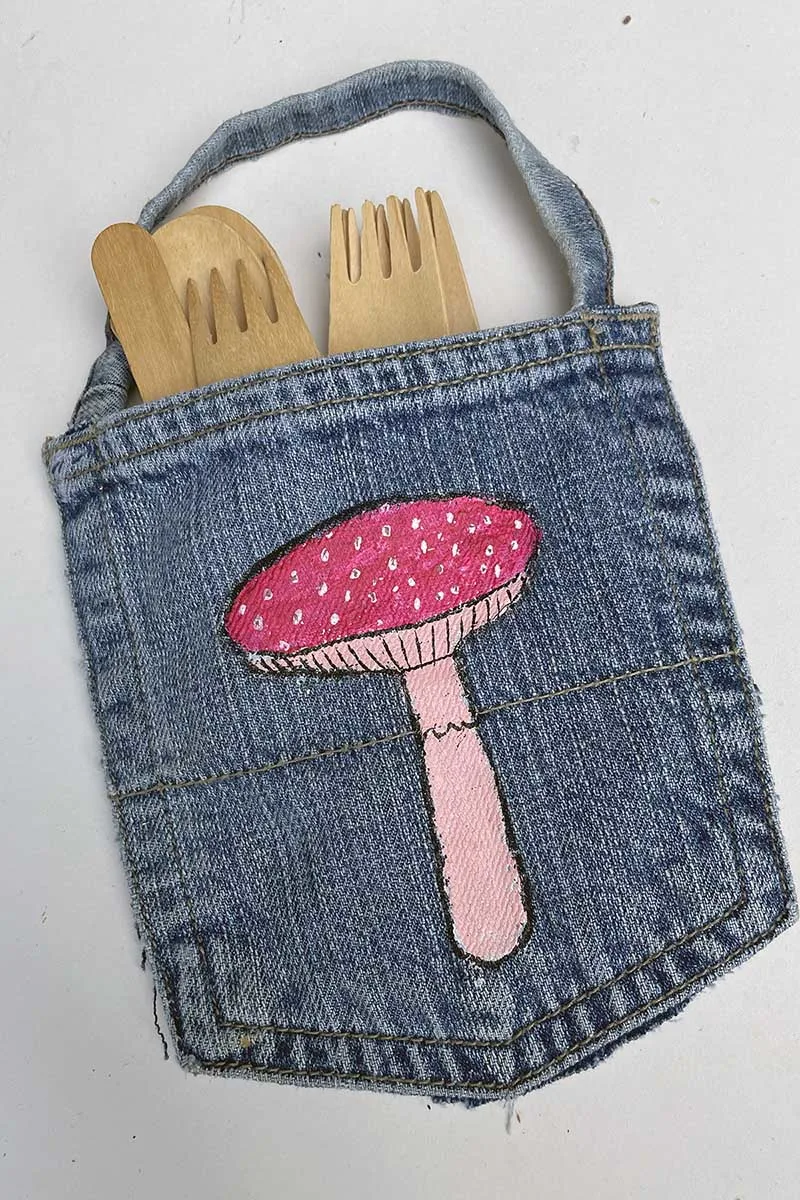
Hanging the Pockets in the Kitchen
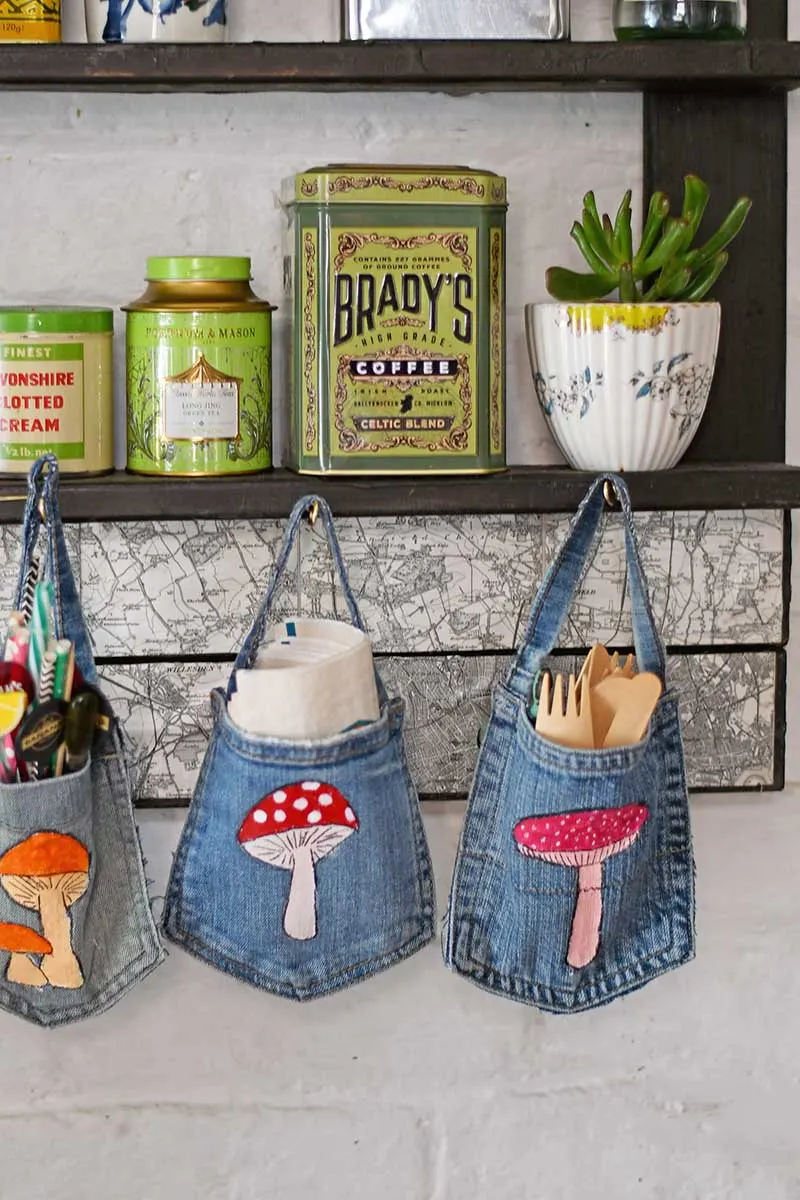
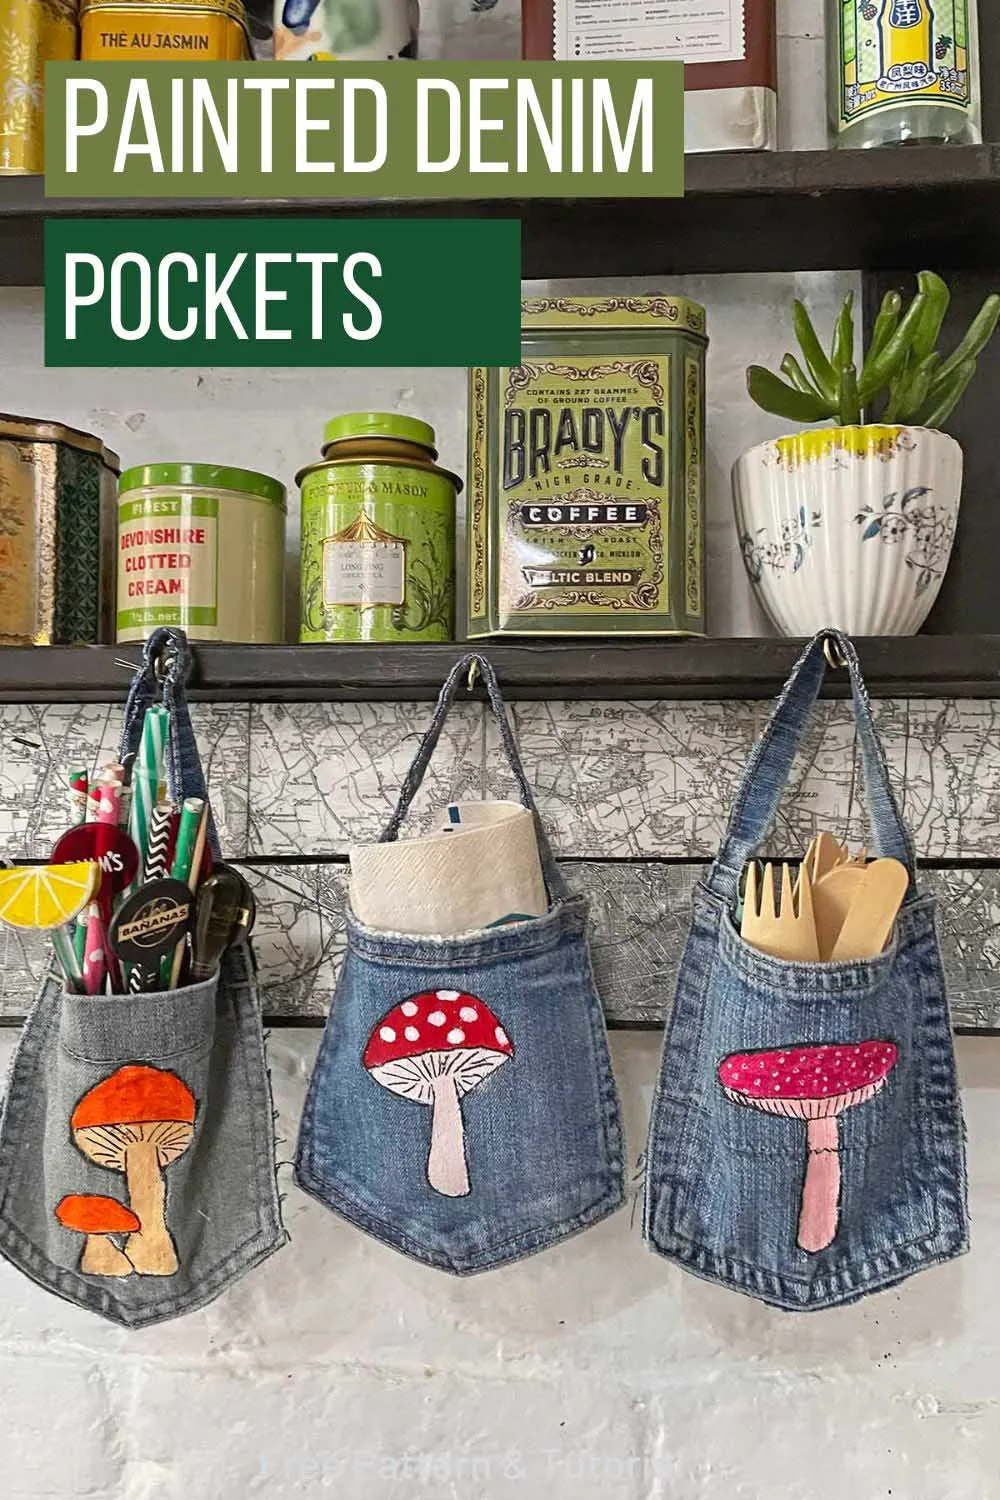
The denim pocket hangers were finally ready. I hung them on hooks in my kitchen, instantly adding extra storage space with a personalized touch. They’re perfect for holding various small items and help keep my kitchen counters decluttered.
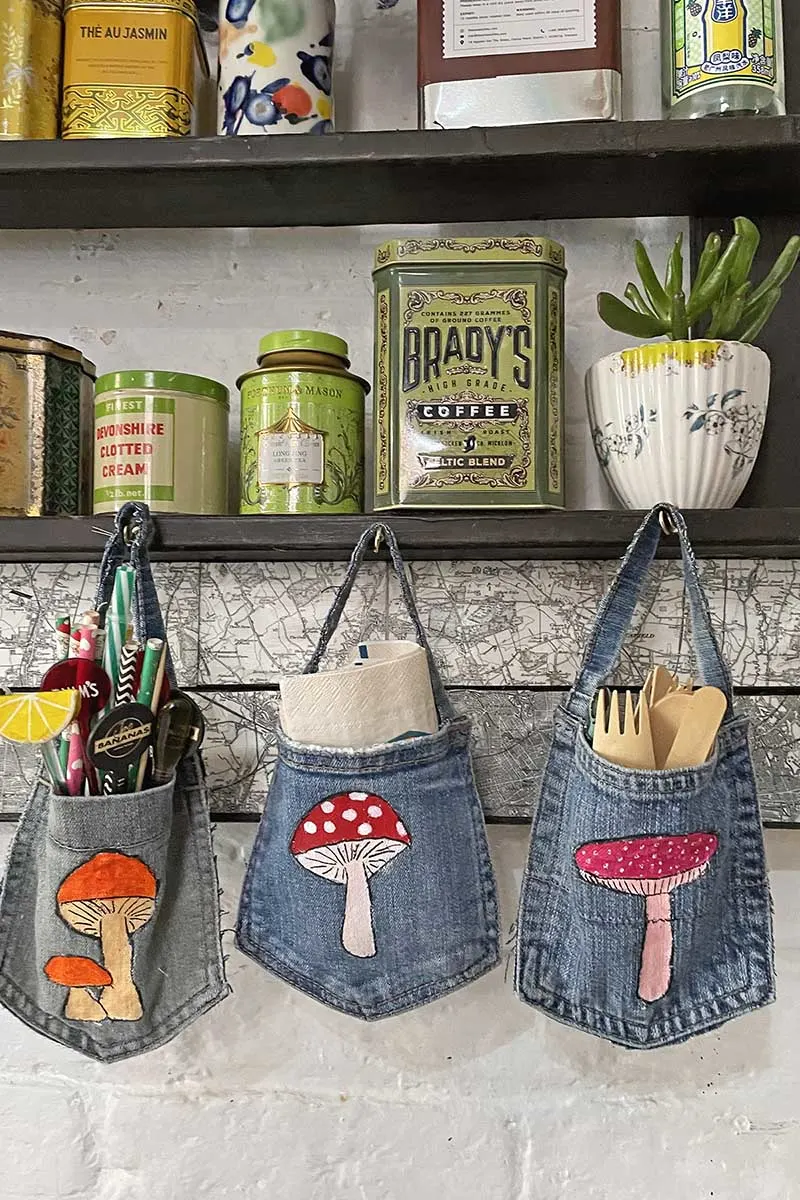
This project was a fun way to repurpose old jeans and a creative way to add functional and stylish storage to my kitchen. If you’re a DIY and sustainability fan or need extra pockets in your kitchen, try this project!
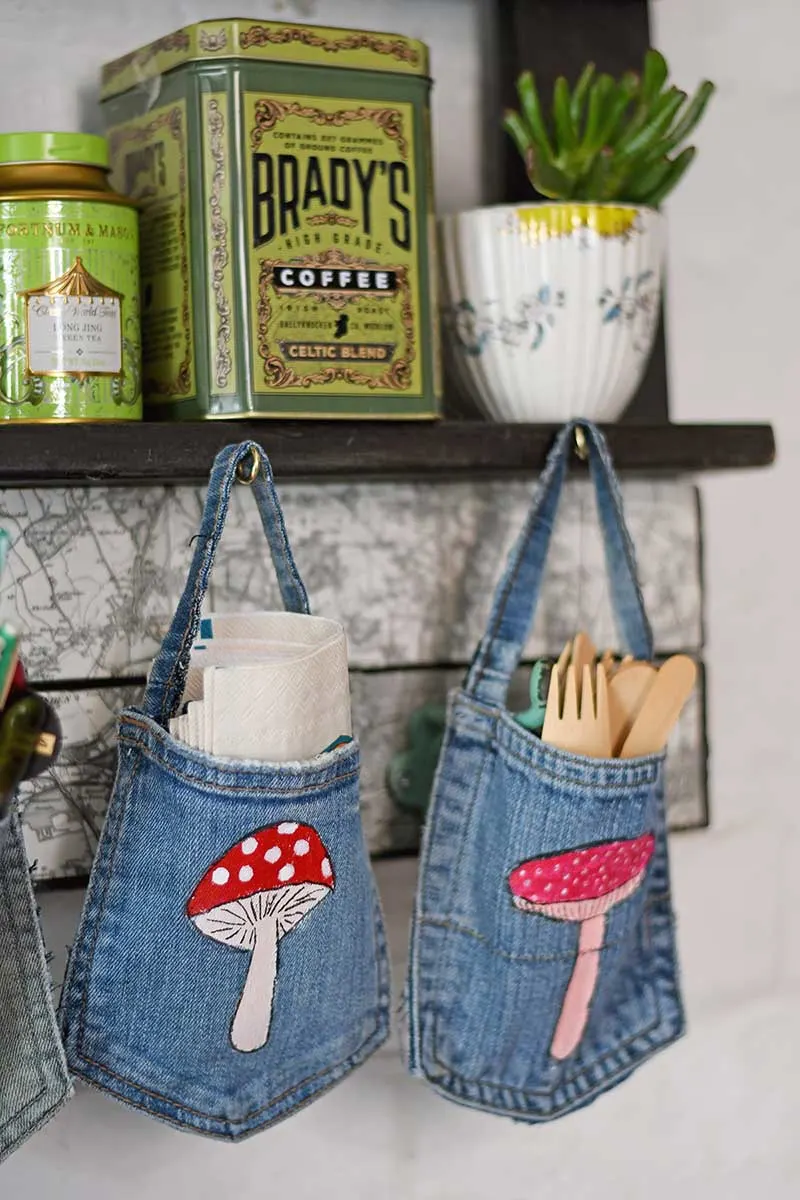
I found the perfect place to hang my painted pockets on the bed slat shelving storage I made for the kitchen last year.
Other Projects
Painting with stencils is another fun way to upcycle denim; check out this stencilled denim table runner. And these letter-stencilled denim draught excluders and fabric key fobs.
You’ll find many more denim storage ideas on the blog, including these DIY storage boxes and popular applique denim pockets. Also, check out the Halloween embroidered denim and Christmas applique hanging pockets.
Check out all the fungi in this cute fabric mushroom display for paint design ideas.
How To Paint On Denim
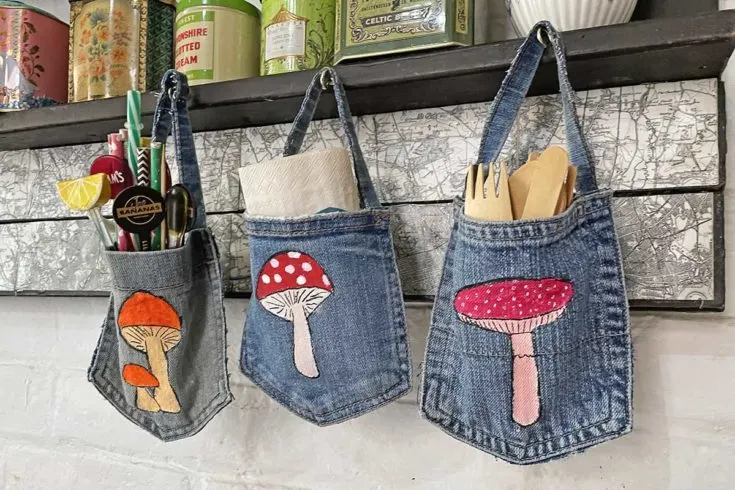
Explore the exciting world of painting on denim with our DIY guide on creating painted-hanging jeans pockets. Add a personal, colourful touch to your space while reusing and recycling your favourite denim pieces.
Materials
- Old jeans pockets and hems
- Acrylic paints and fabric medium
- Embroidery tracing pen
- Black sharpie
Instructions
- Draw around your pocket for a template and sketch the design you will paint to ensure it fits the denim pocket.
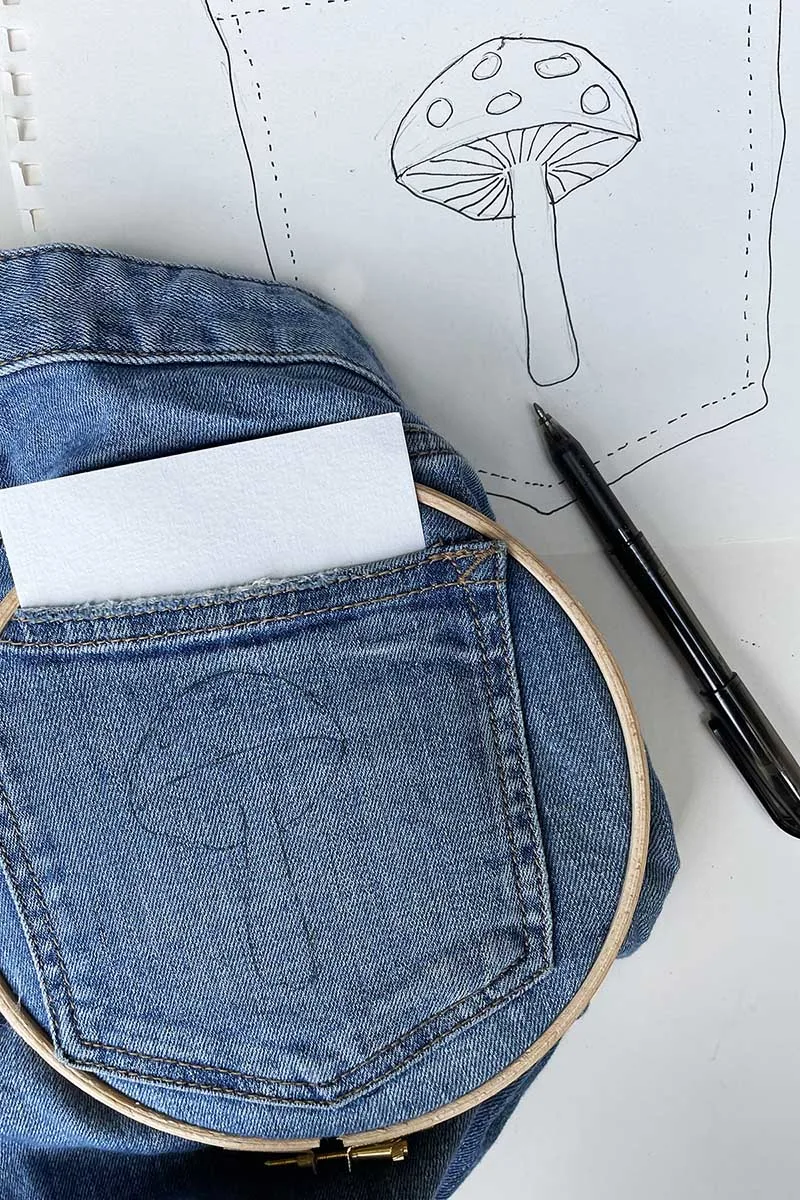
- Using the embroidery pen, copy the design onto the back of the pocket.
- Mix the acrylic paint and fabric medium according to the instructions on the bottle. Then paint the design background white colour.
- Wait for the white paint to dry. Then before adding the colour paint to your design, test them on a swatch.
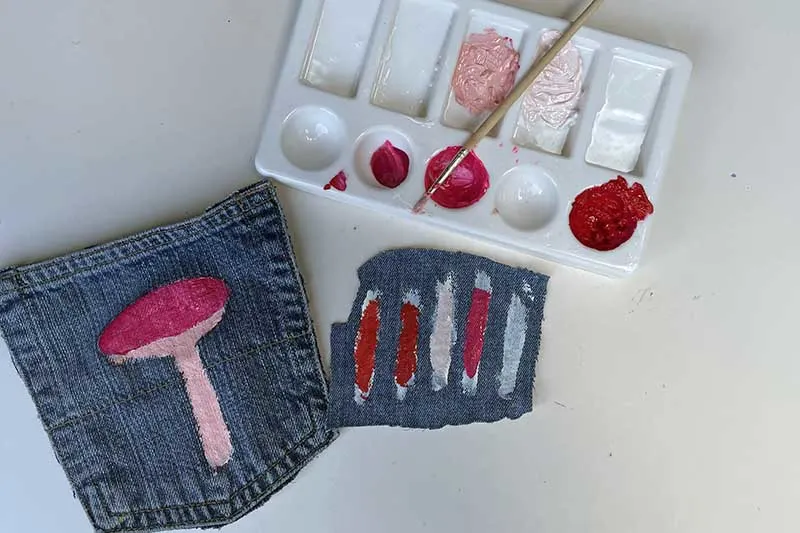
- Apply your paint in thin layers to prevent cracking or peeling. Let each layer dry before applying the next one. Work from light to dark Start with lighter colours and gradually add darker ones. This approach gives your design depth and dimension.
- If you're looking for a way to make your images look neater and more professional, edging them with a permanent marker can be a game-changer. This approach can create defined lines, add contrast, and give your design a polished, finished look.
- When the painted pocket design is finished sew the jeans' hem into a hanging loop.
Pin for later!

creativejewishmom/sara
Wednesday 28th of June 2023
Oh wow Claire, these are absolutely fantastic! Thanks for sharing on craft schooling sunday!
Claire Armstrong
Thursday 29th of June 2023
Thank you, Sara they were fun whimsical project.
Pam
Wednesday 28th of June 2023
Oh, these are so cute! I just love those little pockets! I'm happy to say I'll be featuring this post tomorrow at Thursday Favorite Things, starting at 10:00 a.m. CST. :)
Claire Armstrong
Wednesday 28th of June 2023
That's awesome! Thank you, I look forward to seeing the feature.
Julie
Tuesday 27th of June 2023
Such a beautiful idea, I love them :-)
Claire Armstrong
Tuesday 27th of June 2023
Thank you, Julie. Simple and fun to make.
anna
Friday 23rd of June 2023
This is such a cute idea. I have seen pants with these designs that sell for more than $100 - so I love the idea of making my own. Also, I learned something new - using the heat from an iron to seal the design.
Claire Armstrong
Friday 23rd of June 2023
Thank you, Anna. I have an old denim jacket that I'm going to paint as I've seen some custom ones in a shop that were lovely but not in my price range. Plus it's more fun and satisfying when you do it yourself
Shirley
Friday 23rd of June 2023
So very cute! Claire, I subscribe to a lot of blogs…probably over 100 but I’ve never actually counted them. You are the only email that I can honestly say I don’t look at and delete all in one breath. I usually see the same old things over and over and over again but I never ever see that with yours. You always have something new and fun and fresh! I might love it, like it or maybe it’s not so favorable but I do go on your blog every single time because I know it will always be something I haven’t seen before. I’ve loved everything you do whether it’s my taste or not. You’re very creative and I appreciate that more than you will ever know!
Claire Armstrong
Friday 23rd of June 2023
Shirley, that is so lovely to hear and very lifting. It's nice to hear that others love my crafts too! I just love to create and to put my own twist on things. I also hope to encourage others to craft as I think it's a fun and therapeutic hobby!